For Apple lovers, iPhones have become indispensable tools for capturing life's moments. However, the limited storage capacity on these devices often necessitates the transfer of videos to a more spacious platform, such as a Mac. Whether you're seeking to create more room on your iPhone or looking to edit your videos on a larger screen, understanding how to transfer videos from iPhone to Mac is a practical skill.
In this guide, we'll explore various methods, ranging from traditional wired connections to wireless alternatives, to ensure you import your videos smoothly and without video quality loss.
How to transfer video from iPhone to Mac: 5 Ways
Method 1. Import videos from iPhone to Mac with iCloud
Utilising iCloud Photos on both your iPhone and Mac provides a cable-free way to sync photos and videos across various iOS devices. This method is applicable for transferring content between Apple devices but it also might be a solution for those looking to transfer photos from an iPhone to a PC. Before you begin, make sure the storage space in your iCloud account is sufficient. If needed, you can either clear up space on iCloud or opt for additional storage through Apple's services.
Here's a step-by-step guide:
- On your iOS device, navigate to "Settings" [your name] → "iCloud" → "Photos."
- Turn on the "Sync this iPhone" option.
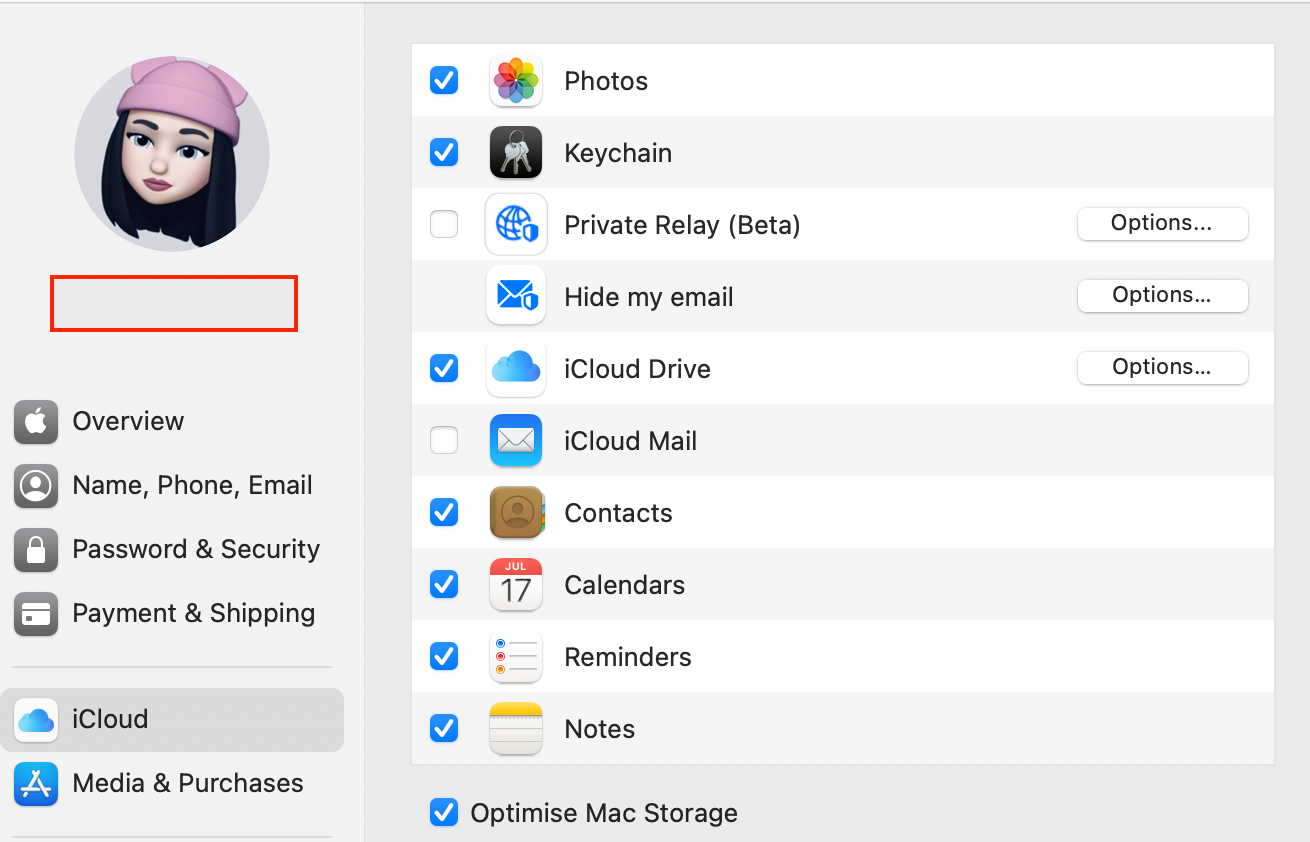
- Open the Apple menu and select "System Preferences" on your Mac.
- Go to "iCloud" or "Apple ID" and choose "iCloud."
- Depending on your macOS version, either check the box next to iCloud Photos (for versions before macOS Catalina) or click "Options" next to iCloud Photos (for macOS Catalina and later).
- Visit iCloud.com on your web browser.
- Sign in to your iCloud account and choose "Photos."
- Select the photos you wish to transfer to your Mac.
- Click on the "Download Selected Items" icon located at the top right corner of the page.
This method is not limited to photos and videos; iCloud supports various file types. Additionally, it can be employed to sync other data, such as calendars, from your iPhone to your Mac whenever you need.
Method 2. Transfer video from iPhone to Mac with AirDrop
Creating a seamless wireless transfer between your Mac and iPhone is a breeze with AirDrop. Before proceeding with this method, ensure that both your Mac and iPhone have WiFi and Bluetooth enabled.
Note: Make sure that your iPhone is running iOS 7 or later, and your Mac is a model from 2012 or later.
Here's a step-by-step guide to transfer data between your Apple devices with AirDrop:
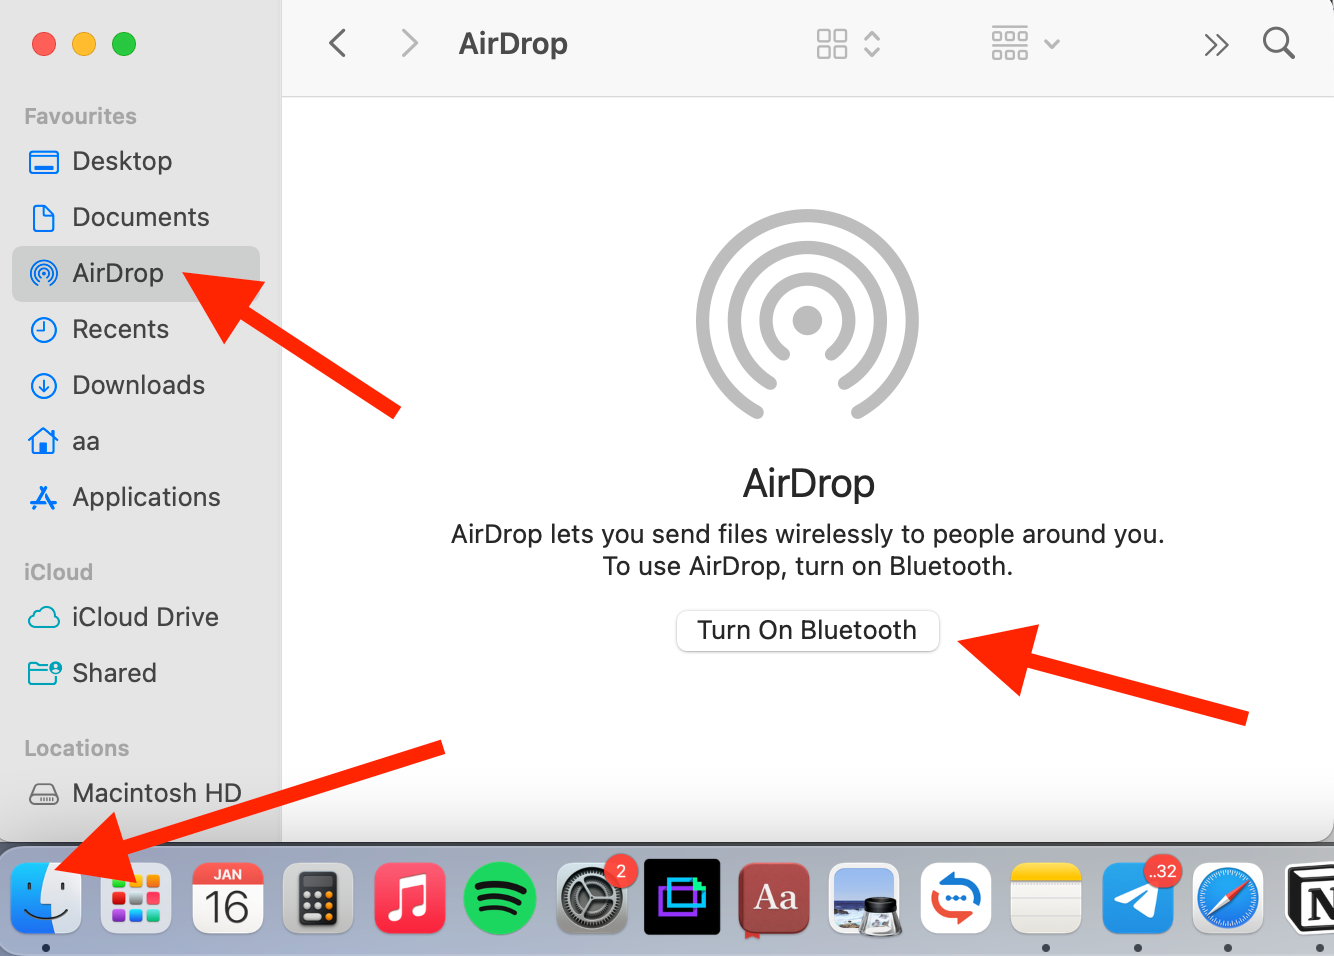
- On your Mac, open "Finder" and navigate to "Go," then select "AirDrop."
- Turn on Bluetooth and WiFi to enable AirDrop.
3. Set the "Allow to be discovered by" option to either "Everyone" or "Contacts Only."
4. Enable AirDrop on your iPhone: swipe up from the bottom of your iPhone screen to access Control Center.
5. Tap on "AirDrop" and choose whether your iPhone should be discoverable by "Contacts Only" or "Everyone."
6. Launch the "Photos" app on your iPhone.
7. Select the videos you wish to transfer from your iPhone to your Mac.
8. Tap the "Share" button and locate your Mac's name in the AirDrop section.
9. Click on your Mac's name to seamlessly import videos from your iPhone to your Mac without relying on iTunes.
With these simple steps, you can effortlessly move your videos between your iPhone and Mac, ensuring a hassle-free sharing experience with no quality loss.
Method 3. Transfer videos from iPhone to Mac via Photos (Wired)
For those who prefer a more traditional approach, transferring videos from your iPhone to your Mac using a USB cable offers a straightforward solution. This method requires the use of an original USB cable and ensures that both your iPhone and Mac are equipped with the Photos app. Once the transfer is complete, you can clear space on your iPhone by deleting the transferred videos.
Here's a step-by-step guide to using the USB cable method:
- Plug your iPhone into your Mac using the original USB cable.
- If the Photos app doesn't open automatically, launch it on your Mac.
- In the sidebar on the left side of the Photos app, click on your iPhone.
- Choose either "Import All New Videos" to transfer all new videos, or manually select specific videos and click "Import Selected."
5. Once the import process is complete, your newly imported videos are now stored on your Mac.
Method 4. Transfer videos from iPhone to Mac with email
In addition to the commonly used methods, there's an unexpected yet convenient wireless approach for transferring videos from your iPhone to your Mac—via the Mail app. With this method, you don't need cables or additional software, making it a simple alternative for those who prefer a wireless transfer.
Follow these steps to transfer videos using the Mail app:
- On your iPhone, choose the videos you want to send to your Mac.
- Tap the Share button, typically represented by a box with an arrow pointing upwards.
- This time, opt for the Mail icon from the available sharing options.
4. Pick a mail account to use for sending the videos and complete any necessary verification steps.
5. Once verified, all the selected videos will be sent to your specified email address.
6. Open the Mail application on your Mac and locate the email containing the videos.
7. View and download the videos directly from the Mail app on your Mac, making the process hassle-free.
This is yet another wireless method to share videos between your iPhone and Mac. It's a suitable option for users who prefer simplicity and value the convenience of utilising familiar applications for data transfer.
Method 5. Import large videos from iPhone to Mac with Google Drive
When dealing with a sizable batch of videos exceeding 2GB in size and seeking an easy method for transferring them from your iOS device to your MacBook, Google Drive is a practical solution. The widely-used Google Drive application offers a seamless way to upload, store, and retrieve your videos across devices. Here's a step-by-step guide on how to transfer videos from iPhone to Mac via Google Drive:
- Download Google Drive on your iPhone if not yet: head to the App Store and download the Google Drive application.
- Sign in with your Google account to get started.
- Open the Google Drive app and upload the videos you wish to transfer.
- Select the videos you want to transfer and upload them to your Google Drive.
- Open your web browser on your MacBook and go to drive.google.com.
- Sign in with your Google account credentials.
- Navigate to the uploaded videos in Google Drive.
- Download the video files you previously uploaded directly to your Mac.
With Google Drive, you can efficiently transfer a batch of videos larger than 2GB from your iOS device to your MacBook using Google Drive.
Transferring files from iPhone to Mac: FAQ
Instead of the bottom line, we're answering a few of the most common questions.
How to transfer videos from iPhone to Mac without losing quality?
When it comes to transferring videos without compromising quality, popular methods like AirDrop, iMessage, iCloud, and Telegram may lead to compression, particularly for large or lengthy videos.
How to transfer videos from iPhone to Mac using Image Capture?
Transferring videos from iPhone to Mac using Image Capture is simple:
- Connect your iPhone to your Mac using a cable.
- Launch Image Capture on your Mac.
- Locate your iPhone under Devices on the left.
- Click on your device icon and then import the desired videos.
This method provides a direct and efficient way to transfer videos without the need for additional software.
How to transfer WhatsApp videos from iPhone to Mac?
To transfer WhatsApp videos from iPhone to Mac:
- Open the WhatsApp app on your iPhone.
- Choose a conversation containing the videos you want to transfer.
- Select photos or videos, tap "All Media" at the top.
- Tap "Select" to choose the desired items.
- Click "Share" and then select "AirDrop."
- Choose your Mac as the target device.
- On your Mac, click "Receive" to complete the transfer.
This method uses AirDrop to quickly transfer WhatsApp videos, ensuring a quick and wireless transfer between your iPhone and Mac.