

We’ve all been there: voice memos full of great ideas that turn into a confusing mess. Your storage fills up, and sorting through these recordings starts to feel overwhelming. Ideally, you’d want to turn those recordings into neat files that are easy to keep track of and share.
But here’s the thing: voice recordings made on Androids and iPhones are saved in the M4A format by default. This format works well on your device, but it’s not as widely compatible as the more common MP3 format, especially if you want to use the recordings in different projects. That’s why you might need to make your voice memos into MP3s from time to time.
Keep on reading, and we’ll guide you through the steps and teach you how to convert a voice recording to MP3.
Read also: Twitch Clip to MP3: Easy Conversion With These 5 Methods
How to Convert a Voice Memo to MP3 on iPhone
If you’re looking up how to save a voice memo as MP3, you probably want to start with built-in tools that are easy to use. Here’s a simple step-by-step:
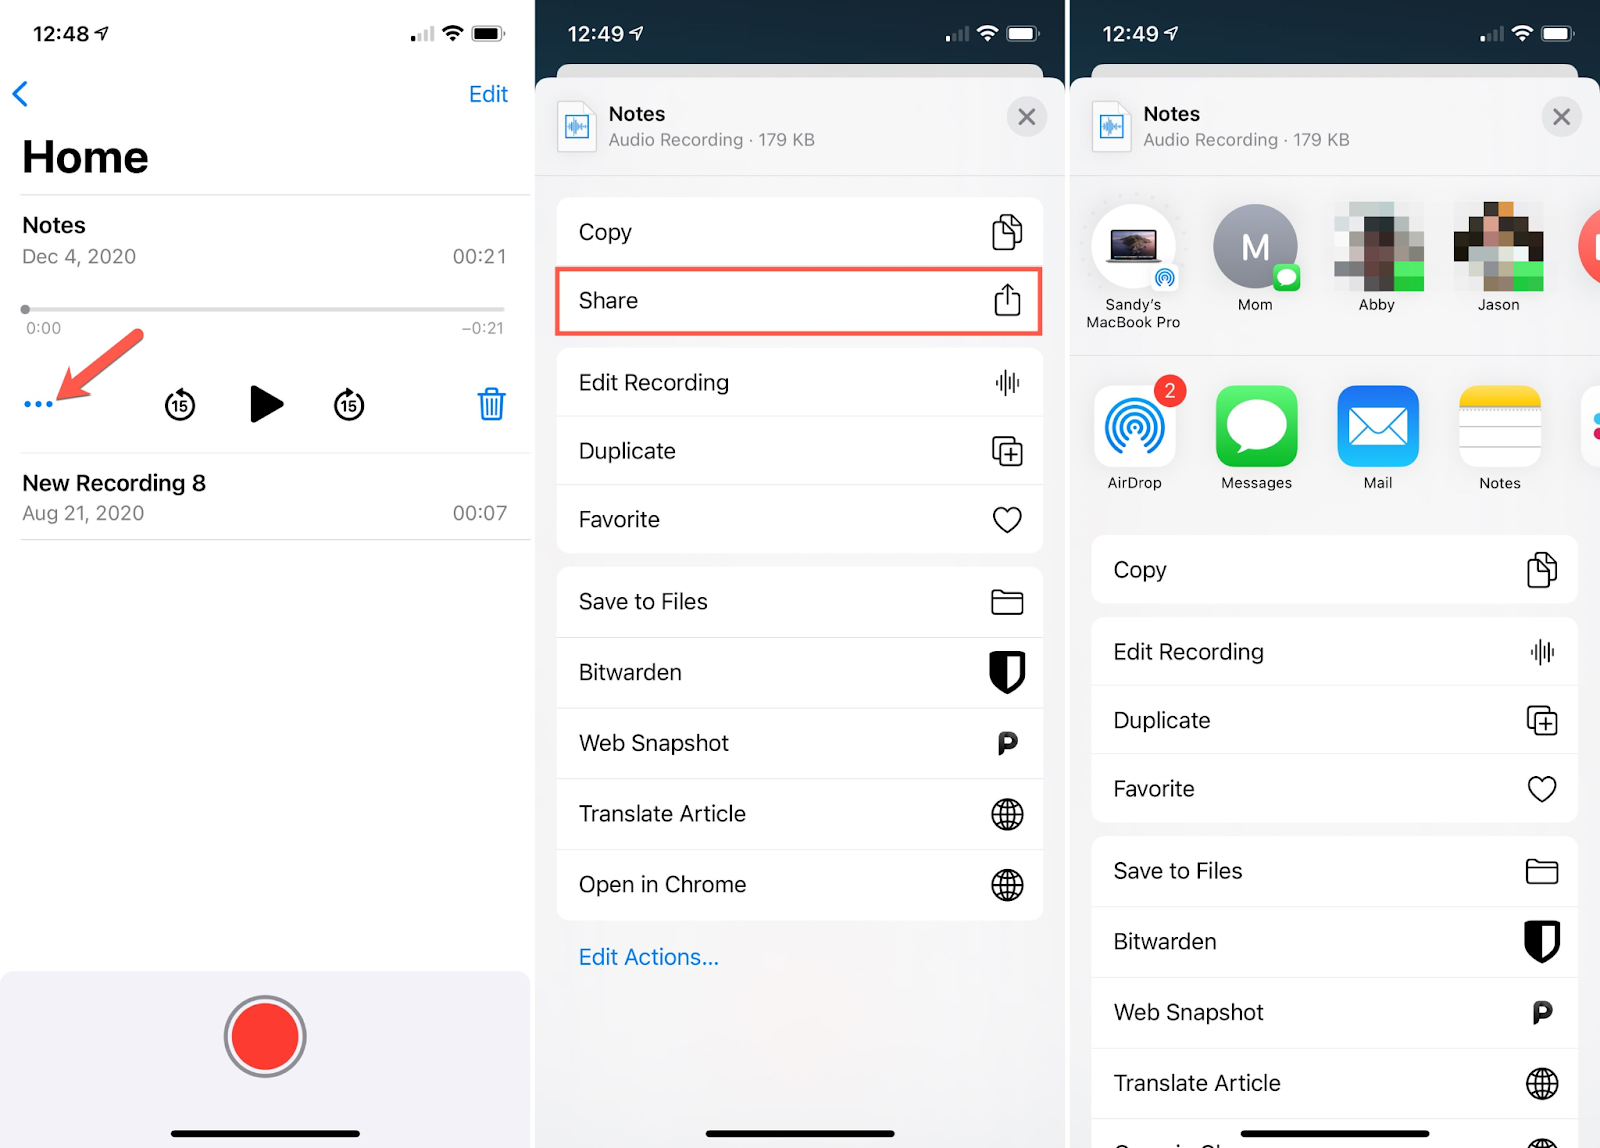
- Navigate to the recording you want to transform in the Voice Memos app.
- Tap Share and find the three dots next to your recording.
- Select any app that allows file sharing, or choose Mail.
- Look for the File icon (usually an upward arrow) in the share menu.
- Pick MP3 from the available formats and press Export.
Your MP3 file should now be ready to send. If not, you can also do it from a separate app. This option is longer but works well when the built-in option isn’t available or isn’t working:
- Store the voice memo on your phone’s internal storage. In the Voice Memos app, tap the three dots next to the recording, then opt for Save to Files and select a folder like Music. This makes it easier to find the file later.
- Download a conversion app; a good free one from the App Store is Media Converter – video to MP3. Look for the blue film strip icon with white arrows. Tap Get to install it, then tap Open.
- Open the app and find your voice memo, press Convert Audio, then choose My iPhone. Select your saved voice memo and tap Open.
- Select MP3 as your export format. In Media Converter, tap the file you chose, then find the Output Format menu. If MP3 isn’t already chosen, select it. You can also adjust settings like bitrate and sample rate if needed.
- Tap Convert to start the process. This button in Media Converter is a red arrow on a blue square.
- Once the conversion is done, you can tap More to move, rename, or share your MP3 file. To save it to Files or share it, use Send/Open In.
How to Turn a Voice Memo Into MP3 on Android
Here’s the approach using built-in tools:
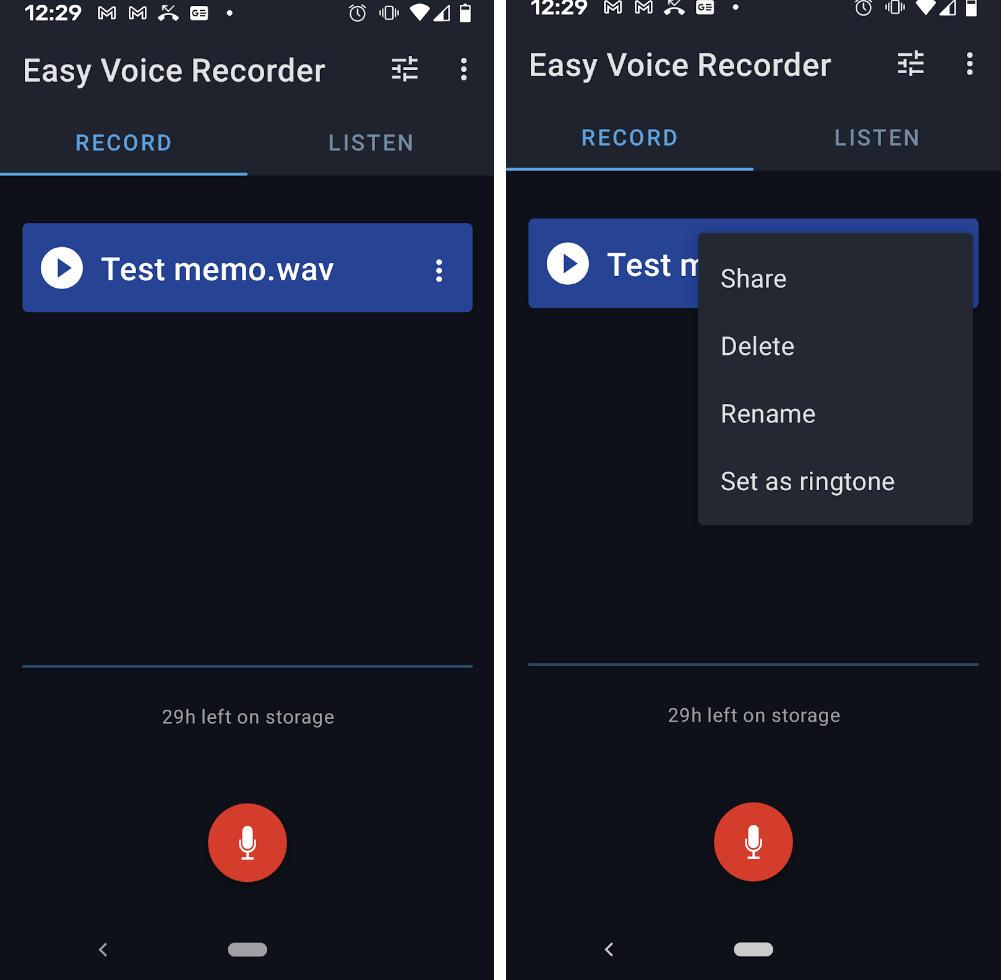
- Start by opening the Files app.
- Find the folder where your voice memos are stored.
- Press and hold on to the voice memo you want.
- Then choose Share from the options that appear.
- Pick Save as copy and pick MP3 for the format.
And there you go!
For Android’s alternative option, you can use Media Converter, the same app but now downloadable from the Google Play Store.
Good to Know: Can You Save Voice Memos to Music?
Yes, you can do it in a couple of different ways. The first one is by exporting the voice memos to a file location that is accessible by the Music app, and the second one is by using built-in sharing options to move the file into your Music library.
Read also: How to Convert SoundCloud Songs to MP3: A 2024 Guide
How to Turn a Voice Memo Into MP3 on PC
If you’re working on a Windows PC and need your voice memos as MP3, here’s a quick and easy way to do it:
- Open File Explorer and locate your voice memo files (commonly in the Sounds section of your User profile).
- Choose Rename by right-clicking on the voice memo.
- Replace the file extension .m4a (or another format) with .mp3 and hit Enter.
- If prompted by Windows to confirm the format change, simply click Yes, and you're done!
An alternative option you can try is using iTunes for Windows:
- Run iTunes. The music note icon in purple, blue, and pink should be in File Explorer or the Start menu. If iCloud isn’t set up, connect your iPhone to your computer using a lightning and USB cable.
- Click Edit in the top menu, then select Preferences.
- In the Preferences window, click Import Settings. This should be under the General tab.
- Select MP3 Encoder from the dropdown menu next to Import Using. This will convert your recording from its current format to MP3.
- Click OK to close the Import Settings window and return to your library.
- Locate the Voice Memo you need in your library. Click to select it and double-click to play. If it’s not there, import it by going to File > Add File to Library…, locating your Voice Memo, and clicking Open.
- Go to File > Convert, then choose Create MP3 Version.
Read also: How to Make Spotify Default Music Player on iPhone, Android, Windows & Mac
How to Save a Voice Memos as MP3 on Mac
The same built-in option is available on Mac as well:
- Start by opening Finder and locating your voice memo files (often in the Voice Memos folder of your Music library).
- Choose Services by right-clicking the voice memo.
- Select Export to MP3.
- Select a folder and name your new MP3 file.
For another option, convert your recordings to MP3 using Apple Music:
- Open Apple Music, found in Finder’s Dock or Applications folder.
- With iCloud on for Voice Memos on both devices, it will appear in your library. If iCloud isn’t set up, use a cable or AirDrop to move the file to your PC.
- Click Music in the top menu, then go to Settings.
- In the Settings window, find and click Import Settings. You might need to look inside the Files tab if it’s not visible right away.
- Select MP3 Encoder from the Import Using menu to change the recording to MP3.
- Click OK to close the Import Settings window. To return to your library, click OK in the Settings window.
- Find the Voice Memo in your library. Click on the title to highlight it, then double-click to begin playback. If it’s not in your library yet, import it by going to File > Import… and selecting the file to open.
- Navigate to File > Convert, then select Create MP3 Version.
Can You Do It Online?
Yes, you can use an online voice memo to MP3 converter, like Online Audio Converter, VEED.io, Restream, and more. These and other online services usually offer a drag-and-drop system for easy conversion. It’s a good idea to use them from a desktop and make sure your recording file is saved on your computer before you start.
Bonus Instructions: How to Convert With Google Drive
Another handy and free online method for converting voice memos to MP3 is through Google Drive. Convenient, right?
Here’s how to do it:
- On your phone, locate the voice memos you want to convert. Select the recordings, tap the three dots, and choose Save to Files.
- Download or open Google Drive on your device.
- Hit the plus icon to transfer your recordings to Google Drive.
- On your PC or Mac, open Google Chrome and log into Google Drive.
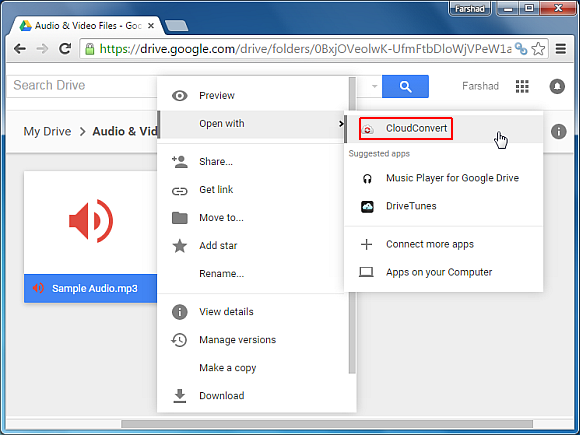
- Find the voice memo file, hover over it, and right-click.
- Choose Open With and select CloudConvert.
- Authorize CloudConvert to access your files, select MP3 as the format, then press Convert. Your voice memos will be automatically changed to MP3 files.
- Press the Download button to save the MP3 file.
The MP3 file will be stored in your Google Drive alongside the original M4A file.
So, these are a few simple methods to make your voice memos into MP3 files. Feel free to try out each of these options and see which one works best for you!


