

You’ve surely noticed voice-overs in videos—this is a widely utilised production technique that involves recording a voice that is synchronised and played alongside a video. YouTubers, TikTokers, and other creatives use it to provide narration, commentary, or supplementary information to enrich the viewer's comprehension of the visual content.
Apart from YouTube or TikTok, voice-overs are used in TV programmes, films, documentaries, advertisements, video games, and educational materials. While professional voice-over artists often use specialised studio equipment to ensure top-notch audio quality, achieving a flawless voice-over at home is also possible. The key lies in selecting the appropriate recording setup.
Why is a good voice-over important for your video?
Simply put, it enhances the viewer's understanding of the content that you’re presenting—it ensures that the message you’re trying to convey efficiently reaches your viewer, especially when visuals alone may not suffice.
Besides, a professional voice-over captivates the audience and keeps them engaged throughout the video, as it evokes emotions, maintains interest, and encourages viewers to continue watching. A polished voice-over also positively impacts the overall quality of your video production and helps you establish credibility and professionalism, leaving a lasting impression on your audience.
Clear audio is crucial for viewers with visual impairments or those who can't fully rely on subtitles or captions (transcripts); thus, it makes sure your video content is accessible to a wider audience.
Do I need to be a professional voice actor to voice over a video?
Not at all! It may enhance the voice-over, however, and save you some post-production time (and nerves), but generally, you don't need to be a pro to achieve a great result. With the right techniques, preparation, and equipment, you can produce high-quality voice-overs yourself.
Here are some tips and best practices:
- Practice reading aloud and experimenting with different tones, pacing, and styles until you find what works best for your project.
- Before recording, thoroughly review the script and familiarise yourself with the content. Understand the intended tone and message to deliver it effectively.
- Choose a quiet space with minimal background noise and echo or use blankets or acoustic panels to dampen any reverberation.
- Invest in a decent microphone and audio recording software (in a minute on that) to capture clear, high-quality sound. Pop filters and microphone stands can also improve recording quality.
- Use audio editing software to clean up recordings, adjust levels, remove any mistakes or unwanted noise, and add effects if necessary.
- Speak clearly and confidently, enunciating words and phrases appropriately. Pay attention to pacing, emphasis, and intonation to convey the intended meaning effectively.
How to voice over a video: Essential stages 101
Stage 1. Prepare for recording
This step may take longer or shorter depending on which kind of videos you want to make a voice-over for. If it’s a quick, spontaneous screencast or brief demonstration of a new interface, it can often be made on the spot with no dull preparations. For videos aiming for a polished presentation or covering substantial information, though, you might want to spend a bit more time on this phase. By preparation we mainly mean steps 1 and 2 from the tips above.
Stage 2. Find a quiet recording environment
Recording studios are often equipped with sound-absorbing foam-lined walls, professional microphone setups with pop screens, and advanced computer workstations, so if you can afford it, you may want to opt for a professional studio—you will save some money on equipment. But achieving high-quality results doesn't always require such elaborate setups. Again, it all depends on what you're recording; some videos can be easily shot and voiced over from the comfort of your bedroom studio with minimal effort and expenditure.
First and foremost, you should find a location free from distracting noises and interruptions.
If recording at work, avoid areas where coworkers' conversations or other disturbances may be heard, or schedule recordings for times when the office is quiet.
Be mindful of noises from heating and cooling systems; if necessary, consider temporarily turning off HVAC systems during recording sessions. If your recording space is near a window, pay attention to external sounds such as wind, birds, or traffic, as these can also interfere with the recording.
Stage 3. Select the right microphone
This stage is one of the key steps on the way to a high-res video voice-over. Avoid relying solely on your laptop's built-in microphone—their capabilities might be enough for Zoom meetings, but when it comes to making a voice-over for a video, even a budget external microphone significantly improves its quality. If you voice over videos often, investing in a USB microphone within the $50-$100 range is worth the effort.
Apart from the mic, buy a pop filter that will eliminate plosives (t, p sounds) from your speech.
Stage 4. Choose audio recording software
Numerous audio recording software options are available, offering similar functionality but many of these tools may be overly complex for the average user, requiring a steep learning curve. We'll cover some user-friendly options in a few moments.
Tip: Place a mic properly! How?
- Put the microphone at an appropriate distance from the sound source. This distance depends on the loudness of the sound, the microphone's sensitivity, and the desired sound characteristics. Generally, closer placement results in more direct sound and less room ambiance, while distant placement captures more room ambiance.
- Position your mic at the correct angle relative to the sound source. For most situations, aim the microphone directly at the sound source to capture the fullest sound. However, experimenting with slight angles may help reduce plosive sounds or capture specific tonal characteristics.
- Adjust the microphone's height to align it with the sound source. For vocals, place the microphone at about mouth level to capture the clearest sound. For instruments, consider the instrument's sound projection and adjust the microphone accordingly.
- Be mindful of the microphone's polar pattern. Position the microphone so that its pickup pattern best captures the desired sound while minimizing unwanted noise and ambiance. For example, if using a cardioid microphone, aim the front of the microphone towards the sound source for optimal pickup.
- Mount the microphone on a shock mount or microphone stand to isolate it from vibrations and handling noise. This helps maintain a clean recording without unwanted disturbances.
Stage 5. Write a script
This step isn't 100% necessary, but if you have the script, it will streamline the job, so you won't feel nervous when recording a voice-over for a video.
All these "uhms" and "ahs" can detract from the message you're delivering and spoil the whole impression—people will think you sound unprofessional, which is a big deal, considering how many content creators are out there these days.
A script should have all you want to say, so begin by outlining key points before fleshing out the script. Before recording, rehearse the script aloud several times, noting any awkward or challenging phrases.
Stage 6. Do a test recording
Some audio recording software allows you to do the test recording right before the main recording. For the test recording, it's not necessary to record the entire script—a few paragraphs will suffice to evaluate the clarity of the audio and to ensure that there are no stray or ambient noises.
Listen back to your test recording using headphones, as they provide superior audio quality compared to computer speakers, so you can detect any unclear audio or unusual noises more effectively. Remember that many of your viewers will likely use headphones, so ensuring the best possible audio experience is essential.
How to voice over a video on desktop, iOS & Android
Now, let's finally see our top picks.
Waveroom
Waveroom is an online podcast and interview recording studio that, thanks to local recording, captures audio in high quality even if the Internet connection is unstable or lost. Waveroom records the audio at 48 kHz and is delivered in uncompressed WAV. The interface is super easy to use, as the tool has nothing extra.
A nice perk is that Waveroom is completely free to use!
Follow the steps below to record a voice-over for a video.
- Log in or sign up to your Waveroom account.
- Select your camera, microphone, and headphones in the Devices tab under the video preview. Connect your best mic to your computer—it will help you get top-notch quality.
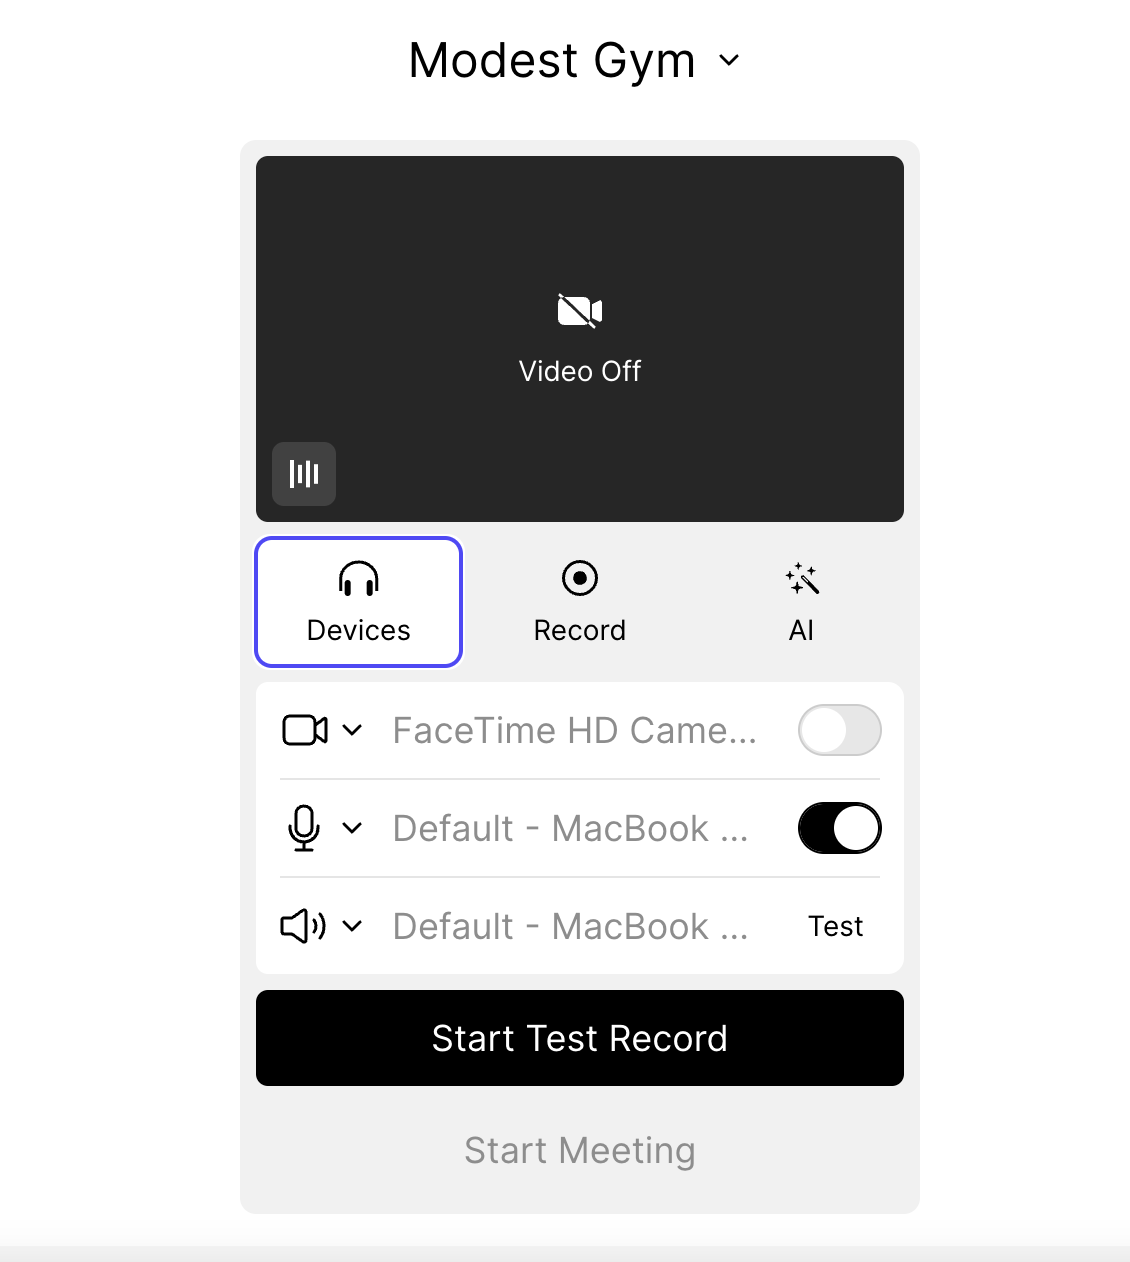
3. Select the audio quality in the Record tab.
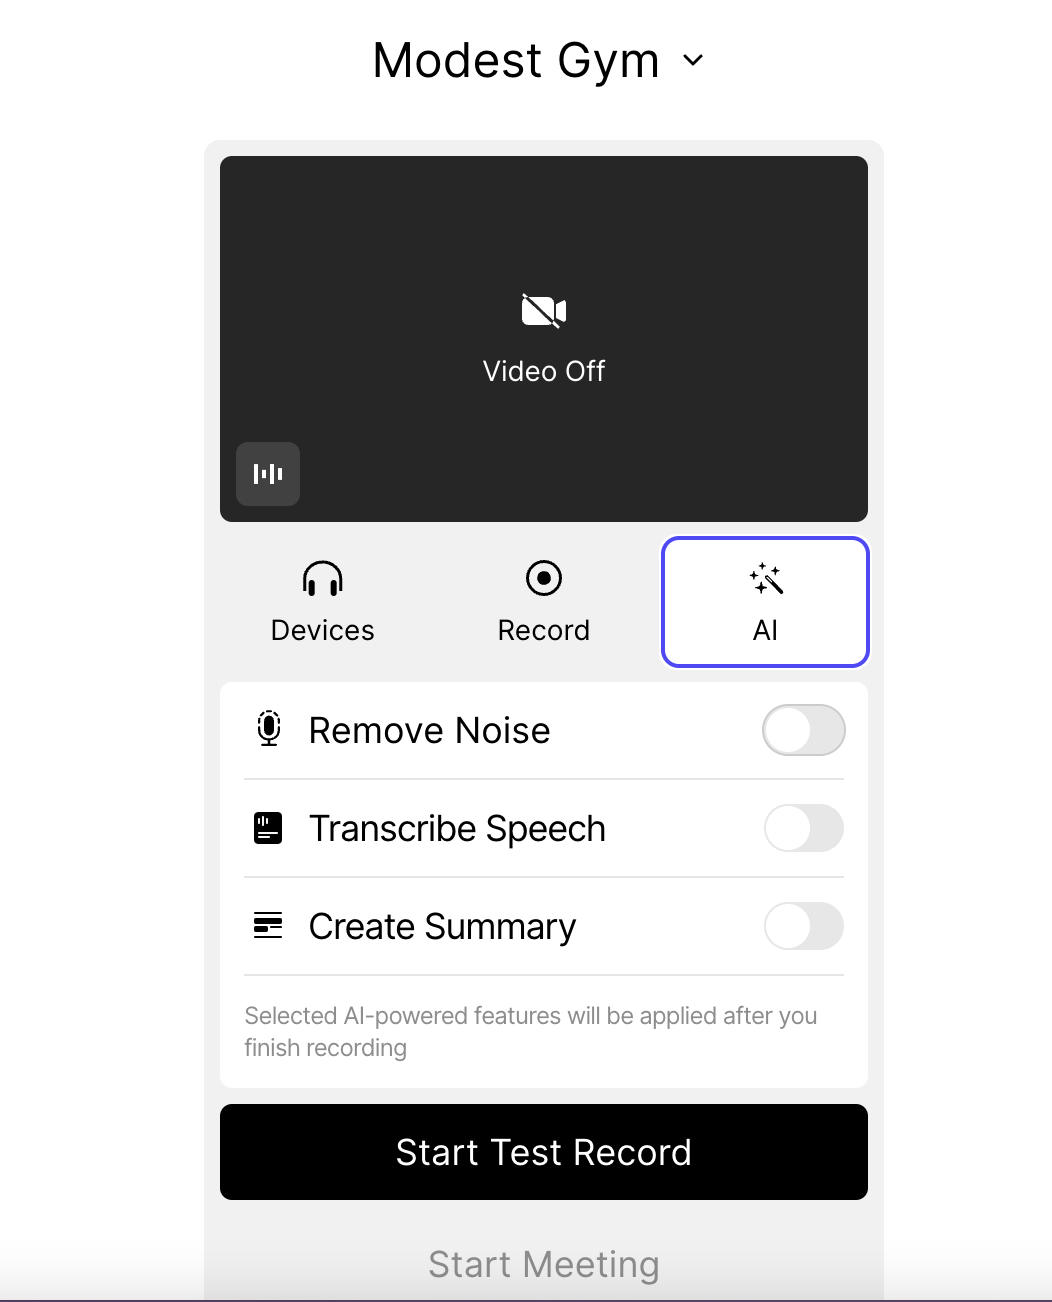
4. Click the Start Meeting button to open your recording room. If you want to test it first, opt for Start Test Record.
5. Click the Record button when you’re ready to start recording the voice-over.
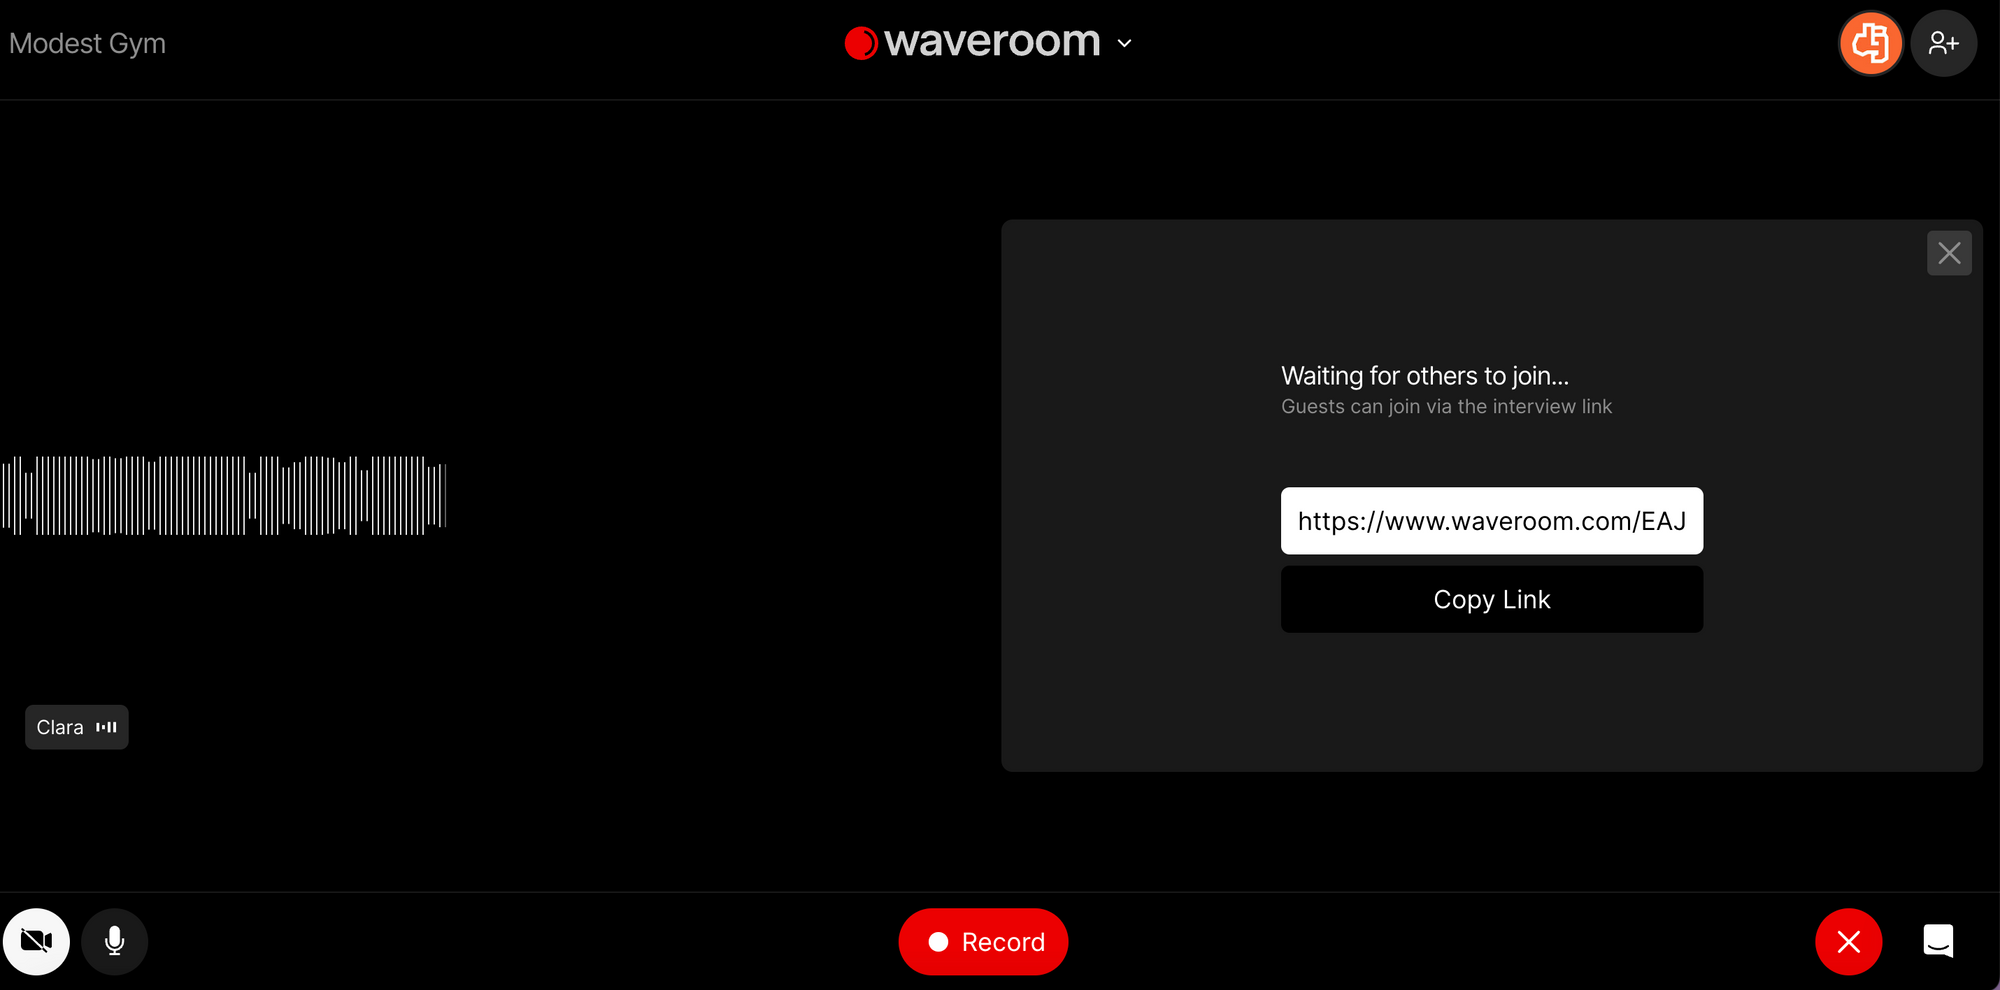
6. When you’re done, click the Stop button to end the meeting.
7. Wait a few seconds while the meeting recording is saving.
8. Once you see the Upload Completed notification at the bottom right corner, click the X sign to leave the meeting.
That’s it! Now you can edit the voice-over if needed and add it to your video in any video-editing software.
Audiate

Another tool that can help you to record a voice-over for a video is Audiate. With this software, it’s as simple as clicking the record button and speaking.
Recording a voice-over with Audiate is easy:
- Download and install it on your computer. Once installed, launch the application.
- Ensure your microphone is properly connected to your computer and selected as the input device in Audiate. You can do this in the application's settings or preferences menu.
- Now in Audiate, start a new project by clicking on the "New Project" button or selecting "File" → "New Project" from the menu.
- Adjust any recording settings such as audio input levels, sample rate, or recording quality according to your preferences.
- Click on the "Record" button in Audiate to start recording your voice-over.
- After recording, you can review and edit your voice-over directly in Audiate: Trim unnecessary parts, adjust audio levels, remove mistakes, or add enhancements as needed to polish your recording.
- Once you're satisfied with your voice-over, save the project in Audiate's native format (.audproj) to preserve your editing work.
- Finally, export the voice-over to your desired format (e.g., MP3, WAV) for use in your video project or other purposes.
Movavi Voice-Over Maker

Movavi is a popular video editor that is used by millions of creators worldwide but now it has a dedicated tool for voice-overs: Movavi Voice-Over Maker.
- Install the software on your PC or Mac.
- Start Movavi Video Editor and click on the "Add Files" button. Select the video you wish to add a voice-over to. The chosen file will then appear in the Media Bin.
- Drag and drop the file into the Timeline located at the bottom of the program window.
- Above the timeline, click on the "Record Audio" button to access the audio recording options. Choose your recording device from the Audio device list.
- Position the red marker at the desired starting point on the timeline and click "Start Recording". Once finished, click "Stop Recording" to complete the audio capture.
6. To save the video with the voice-over, tap on the "Export" button and select the desired format.
Kapwing

If you're looking for a powerful video maker with a voice-over feature, Kapwing is a decent solution. This online tool is packed with features to enhance your clips, making it ideal for tutorials, movies, and social media content.
Here's how to make a voice-over for a video, using Kapwing:
- Visit the official Kapwing website and select the "Start Editing" option to access the editor.
- Upload your media by clicking on the startup screen.
- Switch to the "Audio" tab.
- Choose to import a voice recording from your PC library or record one from scratch.
- Click on "Record" to open the recording tool, select your microphone from the dropdown list, and start recording by clicking the red button.
- Stop recording by clicking the red button again, and Kapwing will automatically add your soundtrack to the timeline.
- Select your voice-over track on the timeline.
- Adjust its speed and volume using the options available in the "Edit" menu.
- Drag the soundtrack to the desired position on the timeline or use the "Timing" tab for precise control.
- Apply fade-in and fade-out effects using the "Effects" tab.
- Split and trim your soundtrack as needed.
- Click the "Export Video" button to save your video with the voice-over as an MP4 file.
How to voice over a video on iPhone

If you're looking to add voice-overs to your videos on iOS, you can use Video Editor and Maker, which is available on the App Store. This application allows you to complement your videos with music from its library or Apple Music, or record your own voice-overs. You can then fine-tune the speed, volume, and fades of your video, and trim it as necessary. While the app is free to download, access to all its features requires a one-time purchase. Additionally, iPad users can also enjoy a version tailored for their device.
Follow this tutorial to get started:
- Download the application from the App Store onto your iOS device.
- Navigate to the Gallery within the app and select the video you wish to edit.
- Tap on "Add Music" and then "Record Audio", followed by the microphone icon to initiate recording.
- Stop recording when finished and tap "Done". Your audio will be instantly added to the timeline.
- Move the audio recording to the desired moment on the timeline using your finger.
- Adjust the volume of the soundtrack using the slider located at the bottom.
- Tap on the recording to access additional options such as Audio Trim and Sound Settings, where you can add faders and loops to your audio.
- Once satisfied with the audio, tap the export icon located in the top right corner of the interface to generate your clip.
- Note that the clip will be saved with a watermark unless you subscribe to the premium version.
How to add a voice-over to video on Android

If you're not an iPhone user, use the VoiceOver app for Android to add voice-overs to your videos; this editor allows you to edit voice recordings, create soundtracks, and add them to GIFs or create ringtones.
Here's how to record a voice-over with this Android app:
- Download the VoiceOver app from Google Play Store and open it.
- Find Recorder tool and adjust its settings according to your preferences, including audio quality, volume, and audio format.
- Use the built-in Audio Stop Countdown timer if you want the recording to have a specific duration.
- Tap the red button on the tool to start recording your voice-over. Pause the recording as needed and stop the audio input once you've completed your script.
- Proceed to edit your voice recording within the app.
- Use the playhead to navigate to specific moments on the track where you want to cut, trim, or mute it.
- If you wish to add a second voice or a background soundtrack to the recording, use the editor's Overdub tool.
- Once you've finished editing your voiceover track, tap Save and enter the name of your recording.
- Tap Save again, review the media information, and hit Done.
You now have a professional-level voice recording that you can add to any video you like.
Instead of the bottom line: Best practices to voice over a video
Warm up your voice
Prior to recording, warm up your voice by doing vocal or speaking exercises to loosen your vocal cords and improve clarity and range. This helps to ensure a more natural and smooth narration. Even singing might help!
Work on articulation
A good voice-over artist should have clear and articulate speech. Each word and sentence should be pronounced accurately to ensure the audience can understand the message without any difficulty.What's more, poor articulation might affect close captioning and auto-subtitles.
Maintain a good posture & breath control
Stand or sit up straight and maintain good posture while recording. Proper breathing techniques, such as diaphragmatic breathing, can help control airflow and provide better vocal support, resulting in a more stable voice-over.
Mind pace & timing
The pacing and timing of the voice-over should match the content and the visuals of the video. You should have a good sense of rhythm, knowing when to speed up or slow down to maintain the audience's engagement and effectively convey the intended meaning.


