If you’ve ever noticed your iPhone stopping music playback when recording a video or audio clip, you’re not alone. It can be frustrating, especially when you want to add a soundtrack to your recordings.
Today, we’ll show you how to record on an iPhone with music. Going forward, you’ll be making uninterrupted, high-quality recordings with the perfect background soundtrack. Let's make the most of your iPhone’s audio capabilities!
Why Is It Difficult to Record Audio & Video Simultaneously on iPhone?
Recording videos on your iPhone and playing music simultaneously has always been tricky. Your phone tends to pause the music intentionally while you’re shooting a video. Apple assumes this interruption is preferred by users — recording without background music is thought to be less intrusive or busy.
The feature also helps avoid potential copyright issues because there are barriers to inadvertently using copyrighted songs without permission.
Throughout this article, we’ll help you with everything related to recording audio and video on your iPhone. We’ll start by guiding you through the process of recording audio (which you can later overlay onto video), and after that, we’ll move on to recording video while keeping audio playing on the same device.
Record Audio on iPhone with Voice Memos
By default, the Voice Memo iPhone app is nestled in the Utilities folder. It’s an iPhone audio recorder that you can use for anything — capture personal notes, classroom lectures, musical ideas, and more. What’s more, there are advanced editing tools embedded into the app, like trim, replace, and resume for precision.
Here’s how to record voice on iPhone (basic features):
- Open the Voice Memo app.
- Start recording by tapping the Record button.
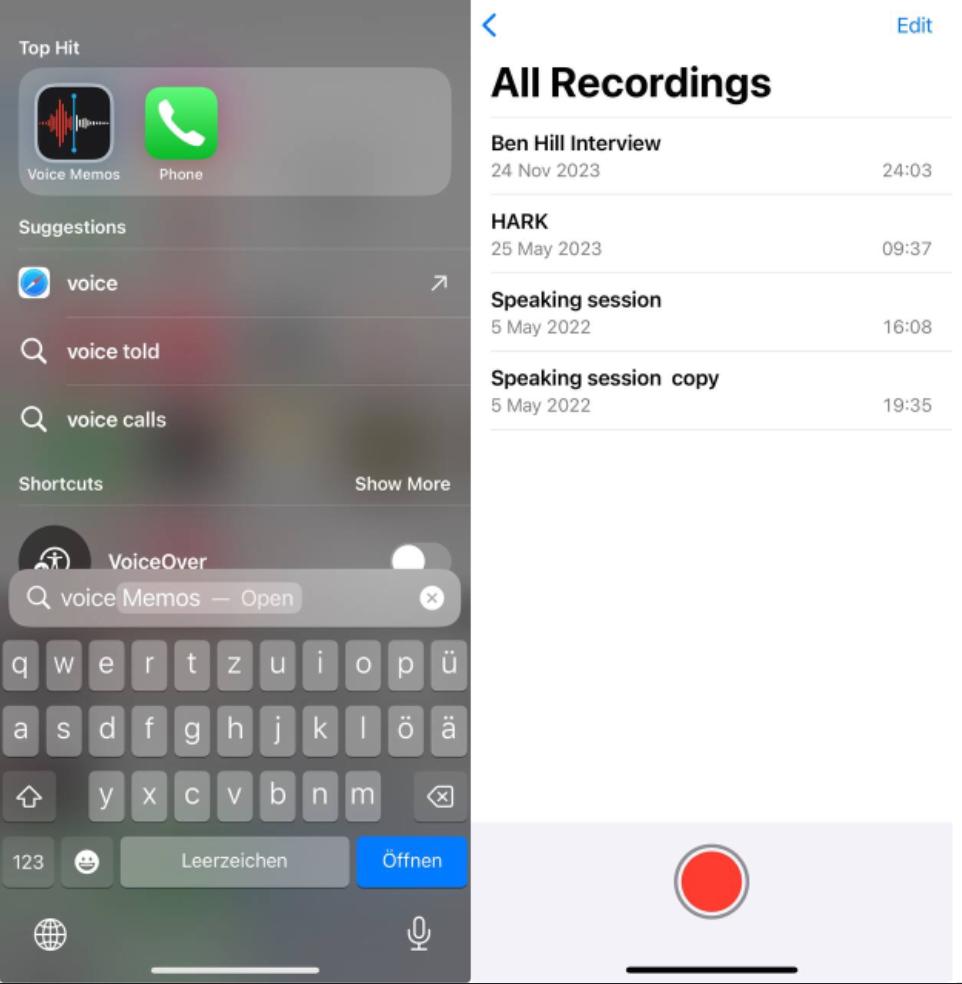
3. Adjust recording levels by moving the microphone closer or farther away.
4. Stop recording with the Stop Recording button.
Your recording will be saved as New Recording or your location name if Location Services is on. It’s possible to change the name by tapping the recording and writing a new one.
To make a more refined audio recording on iPhone, try these advanced features:
- Record in parts by pausing and resuming.
- Swipe up for more details during recording.
- Pause and resume as needed.
- Review your recording with the Play button.
- Drag the waveform to change the playback starting point.
Voice Memos syncs with iCloud settings, so your recordings update across all your Apple devices — iPhone, iPad, and Mac. But you can also take advantage of Location Services for location-based naming.
Use the Audio Recorder in GarageBand
What if you want to learn how to record a song on an iPhone? You can leverage the Audio Recorder in GarageBand, which is suitable for recording vocals, instruments, or any sound with your device’s microphone. Here’s how:
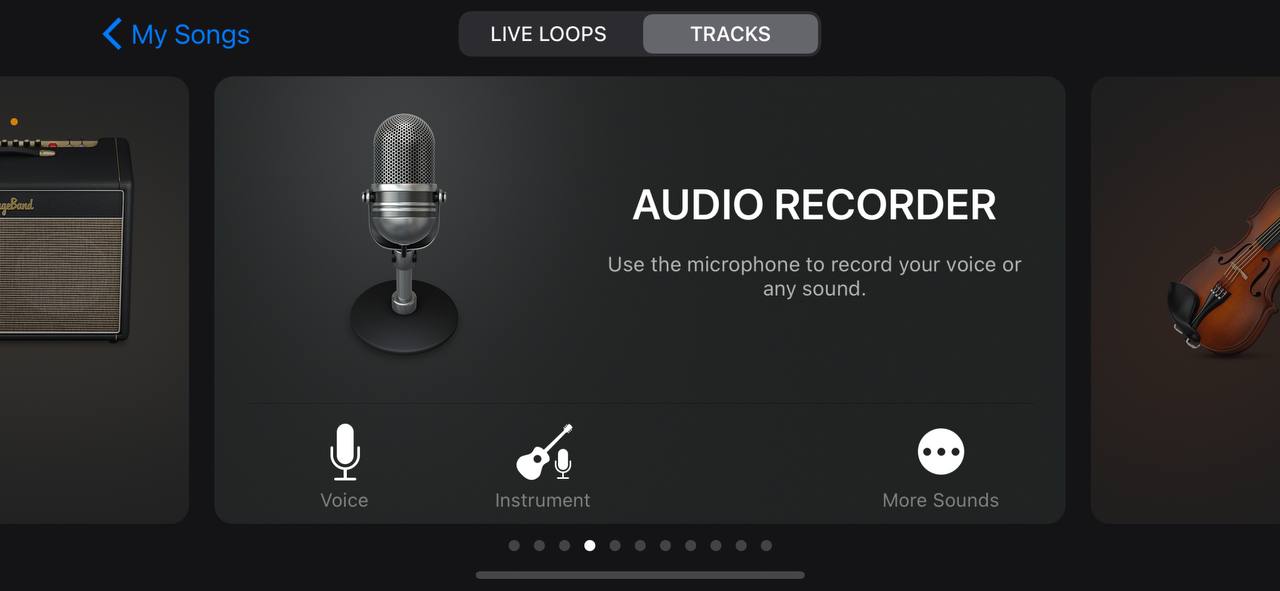
- Tap the Record button in the control bar.
2. Recording begins at the playhead’s current position, which is indicated by the red area on the ruler.
3. Sing, play an instrument, or produce sounds into the microphone.
4. Tap the Play button to stop recording.
5. Tap it again to playback your creation.
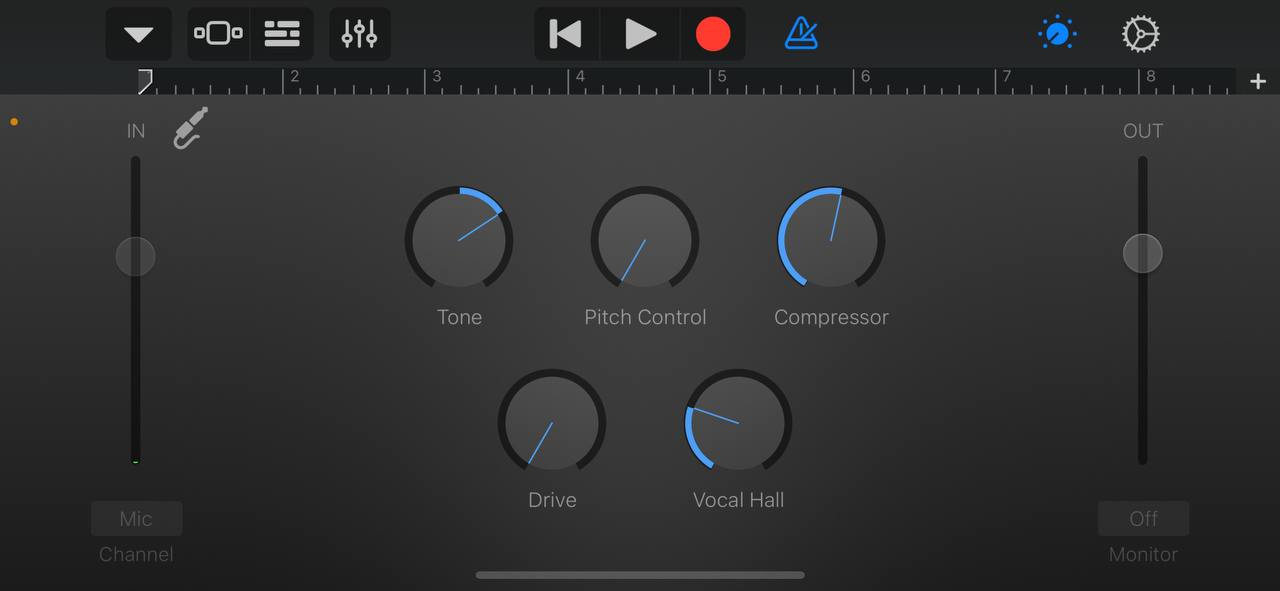
In GarageBand, there is the Fun view for quick adjustments, and the Studio view for more detailed enhancements for your recordings.
To enhance your recordings, try minimizing unwanted background noise with the noise gate feature. It is activated through Input Settings — adjust the slider until noise is reduced and tap Done to finish the process. Alternatively, there are many tools that handle unwanted noise, too.
Record Audio with Screen Recording on iPhone
Well, let’s go back to the basics and ditch the apps for a moment. Follow these steps to capture your screen with background music:
- Go to Settings and then Control Center.
- Tap the + next to Screen Recording to turn it on.
- Depending on your iPhone model:
- Swipe up on iPhone 8 and earlier.
- Swipe down from the top-right on iPhone X and later.
4. Tap the iPhone Screen Recording CC icon. The icon resembles a shutter button and initiates screen recording, even with music playing in the background.
5. To finish recording, press the red Screen Recording icon.
Whenever you need it, the recorded video will be available in the Photos app.
Is It Better to Record Videos and Add Music Later?
Sometimes. It can make more sense for you to record a video separately and add music during editing because it offers more flexibility and control over the final outcome. This approach is particularly beneficial when you use music as background ambiance or mood enhancement. It also minimizes the risk of quality compromises or glitches.
That said, recording simultaneously is still great for certain scenarios — for example, singing or dancing. It’s up to you whether you want the simplicity of recording both at the same time or the control over each element by recording them independently.
How to Record Audio on iPhone: Tips for Better Quality
While the iPhone may not match studio recording standards, with some know-how, you can record audio on an iPhone with reasonably good quality:
- Clear the mic path — Ensure that no objects obstruct the microphone located at the bottom of your iPhone. Avoid placing items like books or files in front of it and, when holding the device, refrain from covering the microphone with your fingers or palm.
- Direct the mic towards the sound source — Direct the bottom of your iPhone towards the person speaking, similar to practices observed in TV news footage.
- Maintain a distance — Place the iPhone slightly under your chin or to the side or on a table in front of you to avoid excessive amplification of breath sounds between sentences.
- Mute or use airplane mode — This will prevent interruptions during recording. You can just mite with the switch on the side, and as for Airplane Mode, it is accessible in the Control Center.
- Add a windscreen — These accessories, sometimes even hand-made, help minimize loud noises and audio distortions caused by wind or heavy breaths.
The best way to record audio on an iPhone is with the built-in apps. But while Voice Memos is convenient, trying out different apps will help you find the one that suits your needs best. Each app has its advantages, so choose based on accessibility and desired features.